 srcmini
本文概述
要创建Excel文件, 我们将使用PHPOffice的PHPExcel项目。该项目为PHP编程语言提供了一组类, 使你可以读写不同的电子表格文件格式, 例如Excel(BIFF).xls, Excel 2007(OfficeOpenXML).xlsx, CSV, Libre / OpenOffice Calc。 ods, Gnumeric, PDF, HTML等。此项目基于Microsoft的OpenXML标准和PHP构建。
为了在你的laravel项目中轻松处理PHPExcel, 我们将使用maatwebsite \ excel软件包。该软件包提供了一种雄辩的方式, 可以借助PHPOffice的PHPExcel来为Laravel 4. *和Laravel 5. *导入和导出Excel和CSV文件。
要求
要在我们的Laravel项目中使用PHPExcel(来自PHPOffice), 你需要在项目中包含Laravel-Excel软件包。
- PHP版本> = 5.3.7
- Laravel> = 4.1
- PHPOffice PHPExcel> = 1.8.0(由composer.json包含)
- 已启用PHP扩展名php_zip(如果你需要PHPExcel来处理.xlsx .ods或.gnumeric文件, 则为必需)。
- PHP扩展名php_xml已启用。
- 已启用PHP扩展名php_gd2(可选, 但对于自动计算确切的列宽是必需的)。
要添加此软件包, 请在composer.json文件中添加以下行, 然后执行composer install:
{
    "require": {
        "maatwebsite/excel": "~2.1.0"
    }
}
或使用composer直接在控制台中使用:
composer require maatwebsite/excel最后, 在yourapp / config / app.php中将软件包加载到laravel服务提供程序中:
'providers' => [
    //...
    Maatwebsite\Excel\ExcelServiceProvider::class, ]
注意:如果你使用Laravel> 5.2, 则需要安装laravelcollective / bus软件包。
要添加laravelcollective / bus软件包, 请在composer.json文件中添加以下行, 然后执行composer install:
{
    "require": {
        "laravelcollective/bus": "^5.2"
    }
}
或使用composer直接在控制台中使用:
composer require laravelcollective/bus最后, 将该包加载到yourapp / config / app.php中的laravel服务提供程序中:
'providers' => [
    // ...
    Collective\Bus\BusServiceProvider::class, // ...
],
你已经准备在项目中使用PHP Office。
特征
因为该库基本上是laravel的PHPOffice的包装, 所以你需要了解一些与原始库的不同之处:
操纵/创建Excel文件
要操纵文件的创建, 请改用回调。
Excel::create('Filename', function($excel) {
    // Call writer methods here
});
保存/导出和格式化
要下载创建的文件, 请使用-> export($ ext)或-> download($ ext)。
- 导出到Excel5(xls)。
- 导出到Excel2007(xlsx)。
- 导出为CSV(csv)。
你可以像这样使用作家:
Excel::create('Filename', function($excel) {
    // Excel code
})->export('xls');

// or
->download('xls');
现在你已经知道了, 你可以继续创建excel文件。
别名使用
要为Excel类注册别名, 请转到yourapp / config / app.php文件并根据需要注册别名:
'aliases' => [
    //...
    'Excel' => Maatwebsite\Excel\Facades\Excel::class, ]
由于我们的别名将是Excel, 因此我们需要在控制器顶部使用use语句, 并且该语句将作为Excel可用。
<?php

namespace App\Http\Controllers;

use App\Http\Controllers\Controller;
use Excel;

class DefaultController extends Controller
{
    public function index()
    {
        // Excel here
    }
}
没有别名的用法
如果没有别名, 则需要在控制器中包含全名的类, 而不要使用Excel。
<?php

namespace App\Http\Controllers;

use App\Http\Controllers\Controller;
use Maatwebsite\Excel\Facades\Excel;

class DefaultController extends Controller
{
    public function index()
    {
        // Excel here
    }
}
下载excel文件
index动作中的以下控制器直接向浏览器生成一个excel文件:
<?php
namespace App\Http\Controllers;
use App\Http\Controllers\Controller;
use Excel;
class DefaultController extends Controller
{
public function index()
{
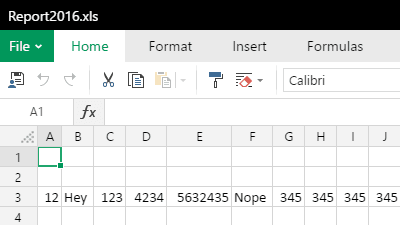
Excel::create('Report2016', function($excel) {
// Set the title
$excel->setTitle('My awesome report 2016');
// Chain the setters
$excel->setCreator('Me')->setCompany('Our Code World');
$excel->setDescription('A demonstration to change the file properties');
$data = [12, "Hey", 123, 4234, 5632435, "Nope", 345, 345, 345, 345];
$excel->sheet('Sheet 1', function ($sheet) use ($data) {
$sheet->setOrientation('landscape');
$sheet->fromArray($data, NULL, 'A3');
});
})->download('xlsx');
}
}将Excel文件保存在服务器中
要将生成的excel文件保存在服务器中, 请使用store方法, 而不要下载:
<?php

namespace App\Http\Controllers;

use App\Http\Controllers\Controller;
use Excel;

class DefaultController extends Controller
{
    public function index()
    {
        Excel::create('Report2016', function($excel) {

            // Set the title
            $excel->setTitle('My awesome report 2016');

            // Chain the setters
            $excel->setCreator('Me')->setCompany('Our Code World');

            $excel->setDescription('A demonstration to change the file properties');

            $data = [12, "Hey", 123, 4234, 5632435, "Nope", 345, 345, 345, 345];

            $excel->sheet('Sheet 1', function ($sheet) use ($data) {
                $sheet->setOrientation('landscape');
                $sheet->fromArray($data, NULL, 'A3');
            });

        })->store('xlsx', storage_path());
        // or  ->store('xls', storage_path('excel-folder'));
    }
}
创建图表
如果你需要在excel文件上创建图表, 则需要使用PHPOffice的”纯PHP”语法。 maatwebsite / excel软件包已经包含PHPOffice, 因此你只需要在其上使用反斜杠来转换类。
以下代码段在laravel控制器中的存储路径中创建了一个图表:
<?php

namespace App\Http\Controllers;

use App\Http\Controllers\Controller;
use Maatwebsite\Excel\Facades\Excel;

class DefaultController extends Controller
{
    public function index()
    {
        $excel = new \PHPExcel();

        $excel->createSheet();
        $excel->setActiveSheetIndex(1);
        $excel->getActiveSheet()->setTitle('ChartTest');

        $objWorksheet = $excel->getActiveSheet();
        $objWorksheet->fromArray(
                array(
                    array('', 'Rainfall (mm)', 'Temperature (°F)', 'Humidity (%)'), array('Jan', 78, 52, 61), array('Feb', 64, 54, 62), array('Mar', 62, 57, 63), array('Apr', 21, 62, 59), array('May', 11, 75, 60), array('Jun', 1, 75, 57), array('Jul', 1, 79, 56), array('Aug', 1, 79, 59), array('Sep', 10, 75, 60), array('Oct', 40, 68, 63), array('Nov', 69, 62, 64), array('Dec', 89, 57, 66), )
        );

        $dataseriesLabels1 = array(
            new \PHPExcel_Chart_DataSeriesValues('String', 'Grafico!$B$1', NULL, 1), //  Temperature
        );
        $dataseriesLabels2 = array(
            new \PHPExcel_Chart_DataSeriesValues('String', 'Grafico!$C$1', NULL, 1), //  Rainfall
        );
        $dataseriesLabels3 = array(
            new \PHPExcel_Chart_DataSeriesValues('String', 'Grafico!$D$1', NULL, 1), //  Humidity
        );

        $xAxisTickValues = array(
            new \PHPExcel_Chart_DataSeriesValues('String', 'Grafico!$A$2:$A$13', NULL, 12), //  Jan to Dec
        );

        $dataSeriesValues1 = array(
            new \PHPExcel_Chart_DataSeriesValues('Number', 'Grafico!$B$2:$B$13', NULL, 12), );

        //  Build the dataseries
        $series1 = new \PHPExcel_Chart_DataSeries(
                \PHPExcel_Chart_DataSeries::TYPE_BARCHART, // plotType
                \PHPExcel_Chart_DataSeries::GROUPING_CLUSTERED, // plotGrouping
                range(0, count($dataSeriesValues1) - 1), // plotOrder
                $dataseriesLabels1, // plotLabel
                $xAxisTickValues, // plotCategory
                $dataSeriesValues1                              // plotValues
        );
        //  Set additional dataseries parameters
        //      Make it a vertical column rather than a horizontal bar graph
        $series1->setPlotDirection(\PHPExcel_Chart_DataSeries::DIRECTION_COL);

        $dataSeriesValues2 = array(
            new \PHPExcel_Chart_DataSeriesValues('Number', 'Grafico!$C$2:$C$13', NULL, 12), );

        //  Build the dataseries
        $series2 = new \PHPExcel_Chart_DataSeries(
                \PHPExcel_Chart_DataSeries::TYPE_LINECHART, // plotType
                \PHPExcel_Chart_DataSeries::GROUPING_STANDARD, // plotGrouping
                range(0, count($dataSeriesValues2) - 1), // plotOrder
                $dataseriesLabels2, // plotLabel
                NULL, // plotCategory
                $dataSeriesValues2                              // plotValues
        );

        $dataSeriesValues3 = array(
            new \PHPExcel_Chart_DataSeriesValues('Number', 'Grafico!$D$2:$D$13', NULL, 12), );

        //  Build the dataseries
        $series3 = new \PHPExcel_Chart_DataSeries(
                \PHPExcel_Chart_DataSeries::TYPE_AREACHART, // plotType
                \PHPExcel_Chart_DataSeries::GROUPING_STANDARD, // plotGrouping
                range(0, count($dataSeriesValues2) - 1), // plotOrder
                $dataseriesLabels3, // plotLabel
                NULL, // plotCategory
                $dataSeriesValues3                              // plotValues
        );


        //  Set the series in the plot area
        $plotarea = new \PHPExcel_Chart_PlotArea(NULL, array($series1, $series2, $series3));
        $legend = new \PHPExcel_Chart_Legend(\PHPExcel_Chart_Legend::POSITION_RIGHT, NULL, false);
        $title = new \PHPExcel_Chart_Title('Grafica anhelada maternofetal :(');

        //  Create the chart
        $chart = new \PHPExcel_Chart(
                'chart1', // name
                $title, // title
                $legend, // legend
                $plotarea, // plotArea
                true, // plotVisibleOnly
                0, // displayBlanksAs
                NULL, // xAxisLabel
                NULL            // yAxisLabel
        );

        //  Set the position where the chart should appear in the worksheet
        $chart->setTopLeftPosition('F2');
        $chart->setBottomRightPosition('O16');

        //  Add the chart to the worksheet
        $objWorksheet->addChart($chart);

        $writer = new \PHPExcel_Writer_Excel2007($excel);
        $writer->setIncludeCharts(TRUE);

        // Save the file.
        $writer->save(storage_path().'/file.xlsx');
    }
}
总结
提到的软件包可帮助你在PHPOffice中使用简单易用的语法, 但是, 如果软件包未涵盖PHPOffice的某些功能, 则你仍可以在控制器中使用纯PHPOffice。
玩得开心 !
评论前必须登录!
注册